Sunday, September 8, 2013

Maroonimisu!

WOW!
Oh my gosh these are super fantascio. My buddy at work said this is what he wanted for his birthday. At first I was thinking he was crazy, and then I couldn't stop thinking about it. I couldn't! Such a natural combo, coffee, the chocolate of the red velvet, and the marscapone? OMnomnomnomnom nom.

For those who don't know, marscapone is basically the Italian version of Cream Cheese. You use it on Tiramisu. Now, the frosting here was Martha's version of the Marscapone frosting, but I found it to be a little bit of a dud. I whipped it too much so that the whipping cream started to grain up a bit. But, it also wasn't very sweet, and it wasn't very steady on the cupcake. I've found that with her frostings they're usually super great or super ... not so faboo.

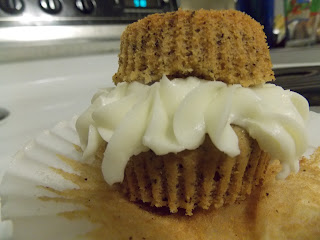
Can you see how floppy the frosting is in the photo? Yeah, it wasn't great. But it tasted pretty good! So I guess no complaints that were outrageous.

 Also, did you notice how awesome the pictures are? Turns out taking photos on your phone is not as good as on an actual camera. The image filters built in are way better on the processor. They also probably might have two cores on the chip processing.

(psst, I'm a nerd FYI. Hence the EE talk).


Who cares? More cupcake photos plz. Kthx.
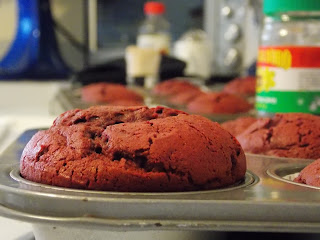

cupcakeeee.
0_0 cupcake (drool)
CUPCAKE.
Almost didn't add this one since the frosting made me think of something that revealed the gutter level of my mind.
Beautiful! Omnom.

This came from multiple sources. The cupcakes from BrownEyedBaker (super good blog, checks it out, mannn). And the frosting from Martha Stewart's "Cupcakes".

Maroonimisu Recipe: 

Makes 12 cupcakes (I doubled it)
Ingredients: 
For the Cupcakes:
4 tablespoons unsalted butter, at room temperature
¾ cup granulated sugar
1 egg
2½ tablespoons unsweetened cocoa powder
3 tablespoons red food coloring
½ teaspoon vanilla extract
½ cup buttermilk
1 cup + 2 tablespoons all-purpose flour
½ teaspoon salt
½ teaspoon baking soda
1½ teaspoons distilled white vinegar
For the toppings: 
  1. 1 Cup warm milk
  2. Instant Coffee
  3. 2 Tablespoons sugar
  4. Coacoa (for dusting)
For the Frosting: Your favorite Marscapone Frosting
Directions: 
1. Preheat oven to 350 degrees F. Line a standard muffin/cupcake pan with liners.
2. On medium-high speed, cream the butter and sugar until light and fluffy, about 3 minutes. Turn the mixer to high and add the egg. Scrape down the bowl and beat until well incorporated.
3. In a separate small bowl, mix together the cocoa powder, vanilla extract and red food coloring to make a thick paste. Add to the batter and mix on medium speed until completely combined. You may need to stop the mixer to scrape the bottom of the bowl, making sure that all the batter gets color.
4. Reduce the mixer speed to low and slowly add half of the buttermilk. Add half of the flour and mix until combined. Scrape the bowl and repeat the process with the remaining milk and flour. Beat on high until smooth.
5. Again, reduce the mixer speed to low and add the salt, baking soda and vinegar. Turn to high and beat for another couple of minutes until completely combined and smooth.
6. Divide the batter evenly between the cupcake liners and bake for about 20 minutes, or until a thin knife or skewer inserted into the center of the largest cupcake comes out clean.
7. Cool for 10 minutes and then remove cupcakes from the pan and place them on a cooling rack to cool completely before frosting.
8. After cooled, mix warm milk and instant coffee and let sit for 5 minutes. Mix with sugar to taste. Brush on cupcakes with a pastry brush. 
9. Top with your favorite Marscapone (or cream cheese) icing. 
10. Resist the urge to eat ALL of them. Try with just one first. 


Friday, August 30, 2013

Cupcake. Earl Grey. Hot.

Don't ask for a Riker beard cupcake. Don't.

Okay, maybe not a "hot" cupcake, but a cooled to the touch one. But youknowyouwantit.

Star Trek is brilliant. I'm an TOS one personally, but the series brought so many issues to the forefront without actually doing anything. They had one episode of two men hating each other. They each thought the other was an abomination. Kirk thought this strange. They looked so similar. Both had half a face of black, half a face of white. But, the reason they were so different? So hateful? One had black on his left side. The other on his white. Obviously, that meant they should judge the other.

During the sixties? Ohhhh man, that was a powerful message. Great stuff.

Anyway, these cupcakes are wonderful. Fluffy as can be, and since the Earl Grey flavor is just soooooo strong, the cream cheese in the icing smooths it out beautifully. Very balance. I'd suggest you'd eat it. Noms.


I like the one with the hole. It's like it's mouth is saying "Heybaby". 
Look how fluffy these fellas are! You can see the specks in them too. They're basically cakey muffins, but they're purrrrfect.

mmmm...icing
Did you know that Pint glasses are the perfect icing bag holder? When you're with a beer lover such as myself you have enough beer glasses to be sick of it. We don't have water glasses, we have pints. There are so many that we've replaced them. Crazy!

hah, it has mustache! 

I grabbed this recipe form ohsoverypretty. I haven't looked at that blog before, but it produced some good results!


Earl Grey Cupcakes with Cream Cheese Frosting
Yields 16

For the cupcake
3/4 cup granulated sugar
4 Earl Grey tea bags
1 3/4 cups cake flour, not self-rising
1 1/2 teaspoons baking powder
1/2 teaspoon baking soda
1/2 teaspoon salt
1/4 cup unsalted butter, room temperature
2 large eggs, room temperature
1/3 cup low-fat sour cream
1/4 cup canola oil or vegetable oil
1 tablespoon pure vanilla extract
2/3 cup (160 ml) whole or 2% milk
For the frosting
1/2 cup unsalted butter, room temperature
1 cup cream cheese (1 package)
Confectionary sugar
Pink sprinkles (optional)
For the cupcake
1. Start off with heating the milk in your microwave. About 45s to 1 minute would work.
2. Place the 4 tea bags in the milk and let it steep for 30 minutes.
3. Preheat the oven to 350 F . In a bowl, mix the cake flour, baking soda, baking powder and salt.
4. Cream the butter and sugar in a separate bowl and then add it to the flour mixture.
5. Beat in eggs, vanilla extract, sour cream and vegetable oil until smooth.
6. Pour the egg mixture into the flour mixture until just combined. Add the tea-milk mixture slowly until just combined.
7. Line your cupcake pan.
8. Fill your cupcake liners until they are half-full – don’t follow the picture!
9. Bake for 15 minutes and do the toothpick test. If not, put them back in the oven for another 2 minutes.
10. Transfer them onto a cooling rack. Let them cool prior to adding frosting.
For the frosting
1. Cream butter and cream cheese.
2. Slowly add confectionary sugar until you are satisfied with the taste. ( I also added some heavy whipping cream) 
3. Fill a frosting bag with some frosting (remember not to fill it to the brim!), and pipe the frosting onto the cupcakes.
4. Finish the cupcakes off by eating them!


Tuesday, March 19, 2013

Step by Step, How to make a Batman Cake-Cheesecake-Cake

This is a delicious, wonderful, and super fun cake. But be forewarned, you do have to make the cheesecake part the night before so it can cool overnight. That's the only hard part. This recipe was adapted from Inside BruCrew Life. Obviously they did theirs a little different from mine (aka SANS The Batman).


I AM... THE CAKE. 

Now for The cake itself, here is the recipe to make that:
(nananananananananananananananana)

BATMAN  Lemon Cake Cheesecake Cake 
Prep Time: 1 hour
Cook Time: 2 hours, 15 minutes
Yield: 16 slices


For the Cheesecake layer
3 (8 oz. each) cream cheese, softened
1 c. sugar
1 c. sour cream
3 eggs
1 Tbsp. vanilla
For the Lemon cake layers
2 lemon supreme cake mixes
8 eggs
2 c. buttermilk
2/3 c. lemon juice
2 (3.4 oz. each) instant lemon pudding mixes
2/3 c. oil
3 (10.6 oz. each) vanilla Cool Whip frosting (found in the freezer isle

For the Decorations
Yellow Food Coloring
Melting Chocolate
Parchment Paper
Printed out logo of THE BAT
Instructions
    For the Cheesecake layer
  1. Beat the cream cheese and sugar until fluffy. Add in the sour cream, eggs, and vanilla and beat until creamy.
  2. Pour into a 10" springform pan that has been lined with parchment paper. Bake at 350* for 45 minutes. Cool on a wire rack for 1 hour. Run a knife around the edges, but don't remove the pan. Chill overnight.
  3. For the cake layers
  4. In a mixing bowl combine 1 cake mix, 4 eggs, 1 c. buttermilk, 1/3 c. lemon juice, 1 box lemon pudding, and 1/3 c. oil. Beat for 1 minute on low, and then 2 minutes on medium.
  5. Pour into a greased and floured 10" round cake pan. Bake at 350* for 42-44 minutes. Cool in the pan for 15 minutes and then flip onto a wire rack to cool completely. While the first layer is cooling, repeat with the other cake mix and the rest of the ingredients.
  6. [You can skip to the photographed decoration instructions below if you feel that you need photo help] To assemble the cake, level both lemon cakes. Place on cake on a plate and smooth on a thin layer of cool whip. Place the cheesecake on top. If the layers don't match up you can use a knife to very carefully remove the sides of the cheesecake to fit. Smooth a thin layer of cool whip frosting on top of the cheesecake. Place the last cake layer on top of the cheesecake. Smooth the Cool Whip frosting over the top and sides of the cake that has already been colored with the yellow food coloring. Cool. 
  7. Lay down parchment paper over the batman logo. 
  8. Melt your melting chocolate (such as Almond Bark) in the microwave  at 15 second intervals in a ziplocked bag. You're "finished" when just tiny bits of chocolate are not melted, for they will melt from the heat of the other chocolate. Once done, cut the tip of the bag with a very sharp set of scissors. 
  9. Trace the outline of batman over on the parchment paper, fill as desired. Multiple attempts were taken by me to get it right to the right thickness so it wouldn't break. Don't be afraid to go slow. 
  10. Create the side skyline by making various heights of rectangles. You could also trace a skyline image that has been printed out like the batman logo. 
  11. Once assembled cake is cooled, add the cooled chocolate decorations by gentling lifting them off the parchment paper, and placing them on the cake. The skyline is best done in small pieces to fit to the curve of the cake. 
Notes
1. I actually only used 2 containers of the Cool Whip frosting on the entire cake.
2. I found that I REALLY did not like this frosting I would suggest a butter cream instead. It was sticky, melty, not easily formed, and just didn't work. It tasted fine, but looked horrible. Maybe for another dish. 
3. I had enough batter extra to make a dozen cupcakes in addition to this cake. So, be wary if you don't have anything to do with the extra batter. You could... always eat it yourself.  We don't judge. 


Decoration Steps in Photos: 
1. Assemble the cake
I had to chop the cheesecake a bit, but it didn't really make a difference. The icing filled in the contours nicely. 

So. Much. Cake. 

2. Ice the cake
Had to do two layers. See the mess? The icing was fussy. 

2. Make the Chocolate

Buildings

Batman is hard to perfect! 

3. Assemble! (wait, that's Marvel not DC!!)

Adding the Buildings
Gently add the not so gentle batman


And you're done! These are great for parties, especially for little boys.

Good Luck!
-K

Thursday, January 31, 2013

Rainbow Bread

Do you  know a kid?


Rainbow Bread


One of my side jobs is to teach kids how to fence (Kids + swords = very safe?). Whenever I bring them something that is super colorful or is mostly food coloring they basically explode. Their eyes grow to anime proportions and they start to drool while the eyes twinkle. 

It's been a while, but lately I've been doing some serious traditional baking of bread baking, cakes, etc. So, to bring some variations, I've been having some fun with food coloring. 

This bread starts off with your typical bread dough. I've been using the bread from  Artisan Bread in Five Minutes a Day. This is possibly the best bread book you can buy. It is super easy and super tasty and delicious. If you haven't read it, because you're some Un'merican communist, put down Mao's little red book and buy it. It will 100% be worth it!


Using your ready to go dough, FYI I use their pan d'epi bread dough here, have it out on a nice floured surface. Keep a bag of flour near by, you will need it. 

 If you don't have a go to bread dough that you like, feel free to use this one. It's very easy to follow, and it'll make your home smell won-der-ful. Bread seems daunting, but actually it's not hard, just tedious. You have to wait and wait to make it happen. 


But, here is how to make the prettiest, and most questionable, bread you'll ever want to eat. 

First, we preheat our oven so it can get to the hot, hot temp of 450F (or however high your oven goes). Then, on a very floured (hehe, makes me think of my favorite scene in Stranger than Fiction... I brought you flours) surface, and make sure your hands are too. 

Ball up your tasty bread. 


UGH. So.. uncolorful

Half it. 
Two boring breads


Half those halves. And, do two more to make it six (the different number of colors I have).
Breads so boring!! Need color.


Now pick up a ball and color it with your respective food coloring. I used both the liquid and the gel, and I found the gel was better. The gel food color was better since it was more about surface area and not mixing it in. The bread soaks up the water in the typical food coloring, and with the gel you kind of just cover it up. 


Gelly. 

Notice: Serious amount of flour. 

AHHH! My bread is bleeding! ... bread vampires? I should call the CW with this idea.

Behold: Reddish bread.
 So, you see how it isn't quite all red, but more marbled? It depends on the bread recipe you use, but mine was a soaker, so you don't see as much red. Good news is, it gave it a really gorgeous marbled artsy bread. So, you don't understand it? But be an abstract bread....

Continue the process with your other bread balls, and layer them up.  If you're doing two colors, you can just switch between. That would be great for a football game in your team colors (GO WATT< WOO!).

I have no favorites (Yes I do, his name is JJ.).

Bread blob.
It's looks like a painting at an elementary school.
Next, you're going to roll it up, into a nice colorful burrito. 

Burrito. 

That looks weird at this angle...


 Pop it in the oven according to your bread recipe's requirements. Mine required a cup of hot water to keep it moist in a broiler pan.
Man, it does not look good from this angle. Do I still want this bread? 
 When it comes out of the oven, refrain from eating. It's hard!!


colorrrsssszzzzzz
 Viola! You have just made the craziest bread ever. Don't worry, it still tastes good. But, it will sure make people look at your sandwich twice.

Nomnomnom.


 eat it!

-K